# Maven
- 出现那种父工程可以正常打所有的包,而子工程单独则会失败,考虑先夫工程install一下,子工程再去打包,一般就没问题了。
# maven 打包 spring boot 生成docker 镜像
# Maven推出强化项目:maven-mvnd
# Maven本质解析
约定
>配置>编码
mvn -version/-v—— 显示版本信息mvn clean—— 清空生成的文件mvn compile—— 编译mvn test—— 编译并测试mvn package—— 生成target目录,编译、测试代码,生成测试报告,生成jar/war文件mvn site—— 生成项目相关信息的网站mvn clean compile—— 表示先运行清理之后运行编译,会将代码编译到target文件夹中mvn clean package—— 运行清理和打包mvn clean install—— 运行清理和安装,会将打好的包安装到本地仓库中,以便其他的项目可以调用mvn clean deploy—— 运行清理和发布
# Maven核心概念
# 聚合
- 为什么要使用聚合?
将多个工程拆分为模块后,需要手动逐个安装到仓库后依赖才能够生效。修改源码后也需要逐个手动进 行 clean 操作。而使用了聚合之后就可以批量进行 Maven 工程的安装、清理工作。 - 如何配置聚合?
在总的聚合工程中使用modules/module标签组合,指定模块工程的相对路径即可
<!-- 配置聚合 --><modules>
<!-- 指定各个子工程的相对路径 -->
<module>starfish-learn-grpc</module>
<module>starfish-learn-kafka</module>
<module>starfish-web-demo</module>
</modules>
2
3
4
5
6
# 继承
- 为什么需要继承机制? 由于非 compile 范围的依赖信息是不能在“依赖链”中传递的,所以有需要的工程只能单独配置
- 创建父工程 创建父工程和创建一般的 Java 工程操作一致,唯一需要注意的是:
打包方式处要设置为 pom - 在子工程中引用父工程 ,从当前目录到父项目的 pom.xml 文件的相对路径
 <parent>
 <groupId>com.starfish.maven</groupId>
 <artifactId>Parent</artifactId>
 <version>0.0.1-SNAPSHOT</version>
 <relativePath>../Parent/pom.xml</relativePath><!-- 以当前文件为基准的父工程pom.xml文件的相对路径 -->
 </parent>
2
3
4
5
6
此时如果子工程的 groupId 和 version 如果和父工程重复则可以删除。
- 在父工程中管理依赖 将
Parent 项目中的 dependencies 标签,用 dependencyManagement标签括起来
<dependencyManagement>
<dependencies>
<dependency>
<groupId>junit</groupId>
<artifactId>junit</artifactId>
<version>4.9</version>
<scope>test</scope>
</dependency>
</dependencies>
</dependencyManagement>
2
3
4
5
6
7
8
9
10
在子项目中重新指定需要的依赖,删除范围和版本号
<dependency>
<groupId>junit</groupId>
<artifactId>junit</artifactId>
</dependency>
2
3
4
# pom
Project Object Model:项目对象模型
- groupid:公司或组织的域名倒序+当前项目名称
- artifactId:当前项目的模块名称
- version:当前模块的版本
# 插件和目标
- Maven 的核心仅仅定义了抽象的生命周期,具体的任务都是交由插件完成的
- 每个插件都能实现多个功能,每个功能就是一个插件目标
- Maven 的生命周期与插件目标相互绑定,以完成某个具体的构建任务
例如:compile 就是插件 maven-compiler-plugin 的一个目标;pre-clean 是插件 maven-clean-plugin 的一个目标
# 生命周期
Maven 有三套相互独立的生命周期,分别是:
- Clean Lifecycle 在进行真正的构建之前进行一些清理工作
- Default Lifecycle 构建的核心部分,编译,测试,打包,安装,部署等等
- Site Lifecycle 生成项目报告,站点,发布站点
# 依赖管理
Maven 中最关键的部分,我们使用 Maven 最主要的就是使用它的依赖管理功能。
# 依赖的范围
有时依赖信息中除了目标 jar 包的坐标还有一个 scope 设置,这就是依赖的范围。依赖的范围有几个可选值,常用的有:compile、test、provided 三个,当然还有不常用的 runtime、system
- compile:默认范围,编译测试运行都有效
- provided:在编译和测试时有效
- runtime:在测试和运行时有效
- test:只在测试时有效
- system:在编译和测试时有效,与本机系统关联,可移植性差
常用依赖范围有效性总结
compile test provided主程序√×√测试程序√√√参与部署√××
# 依赖的传递性
A 依赖 B,B 依赖 C,A 能否使用 C 呢?那要看 B 依赖 C 的范围是不是 compile,如果是则可用,否则不可用。
# 依赖的排除
如果我们在当前工程中引入了一个依赖是 A,而 A 又依赖了 B,那么 Maven 会自动将 A 依赖的 B 引入当 前工程,但是个别情况下 B 有可能是一个不稳定版,或对当前工程有不良影响。这时我们可以在引入 A 的时候将 B 排除。
<dependency>
<groupId>net.lazyegg.maven</groupId>
<artifactId>Hello</artifactid
<version>0.0.1-SNAPSHOT</version>
<scope>compile</scope>
<exclusions>
<exclusion>
<groupId>commons-logging</groupId>
<artifactId>commons-logging</artifactId>
</exclusion>
</exclusions>
</dependency>
2
3
4
5
6
7
8
9
10
11
12
# 统一管理所依赖 jar 包的版本,对同一个框架的一组 jar 包最好使用相同的版本。为了方便升级框架,可以将 jar 包的版本信息统一提取出来
# 依赖的原则:解决 jar 包冲突
- 依赖传递
- 路径最短者优先
依赖链路一:A -> X -> Y -> Z(21.0),依赖链路二:B -> Q -> Z(20.0),最终选择二
- 路径相同时先声明者优先
细化处理,即是:
Maven默认处理:采用此种方法,要牢记Maven依赖调节机制的基本原则,路径最近者优先和第一声明优先;排除法:上面Maven Helper的实例中已经讲到,可以将冲突的Jar包在pom.xml中通过exclude来进行排除;版本锁定法:如果项目中依赖同一Jar包的很多版本,一个个排除非常麻烦,此时可用版本锁定法,即直接明确引入指定版本的依赖。根据前面介绍Maven处理Jar包基本原则,此种方式的优先级最高。这种方法一般采用上面我们讲到的如何统一Jar包依赖的方式。
# 排查依赖冲突
- 生产排查:
mvn dependency:tree -Dverbose- 注意不要省略
-Dverbose,要不然不会显示被忽略的包。
- 注意不要省略
# 坐标
- groupid:公司或组织的域名倒序+当前项目名称
- artifactId:当前项目的模块名称
- version:当前模块的版本
我们自己的 Maven 工程必须执行安装操作才会进入仓库。安装的命令是:
mvn install
# Maven常用命令
mvn -version/-v—— 显示版本信息mvn clean—— 清空生成的文件mvn compile—— 编译mvn test—— 编译并测试mvn package—— 生成target目录,编译、测试代码,生成测试报告,生成jar/war文件mvn site—— 生成项目相关信息的网站mvn clean compile—— 表示先运行清理之后运行编译,会将代码编译到target文件夹中mvn clean package—— 运行清理和打包mvn clean install—— 运行清理和安装,会将打好的包安装到本地仓库中,以便其他的项目可以调用mvn clean deploy—— 运行清理和发布
# Maven可以干啥
- 添加第三方jar包
- jar包之间的依赖关系: Maven 可以替我们自动的将当前 jar 包所依赖的其他所有 jar 包全部导入进来
- 获取第三方jar包: Maven 提供了一个完全统一规范的 jar 包管理体系,只需要在项目中以坐标的方式依赖一个 jar 包,Maven 就会自动从中央仓库进行下载到本地仓库
- 将项目拆分成多个工程模块
- 构建项目(打包,编译等)
# 为什么使用Maven这样的构建工具
一个jar包依赖其他的jar包需要自己手动的加入到项目中
jar包版本不一致的风险
一个项目就是一个工程
# maven是什么
maven是一款服务于java平台的自动化构建工具
构建
- 构建的各个环节
- 清理clean:将以前编译得到的旧文件class字节码文件删除
- 编译compile:将java源程序编译成class字节码文件
- 测试test:自动测试,自动调用junit程序
- 报告report:测试程序执行的结果
- 打包package:动态Web工程打War包,java工程打jar包
- 安装install:Maven特定的概念-----将打包得到的文件复制到“仓库”中的指定位置
- 部署deploy:将动态Web工程生成的war包复制到Servlet容器下,使其可以运行
# 安装maven
- 当前系统是否配置
JAVA_HOME的环境变量 - 下载maven,解压maven放在一个非中文无空格的路径下
- 配置maven的相关环境变量
- 在环境变量增加M2_HOME,路径是maven解压后的根目录
- 在环境变量里的path中增加maven/bin的目录
- 验证:maven -v 查看maven版本
# setting
setting.xml是maven的管理配置文件,包含了系统级别的配置和当前用户级别的配置,用户级别的路径是~/.m2,系统级别的是$M2_HOME/conf,当然了$M2_HOME是在安装的时候设置好的maven路径,我们一般使用的是用户级别的文件。
<settings xmlns="http://maven.apache.org/SETTINGS/1.0.0"
 xmlns:xsi="http://www.w3.org/2001/XMLSchema-instance"
 xsi:schemaLocation="http://maven.apache.org/SETTINGS/1.0.0
 https://maven.apache.org/xsd/settings-1.0.0.xsd">
 <localRepository/>
 <!-- 本地仓库地址,默认情况下,下载到本地的代码库存放在${user.home}/.m2/repository文件夹中的,用户如果想存在放其他地方,配置该属性即可 -->
 <interactiveMode/>
 <!-- 用户交互模式,默认为true -->
 <usePluginRegistry/>
 <!-- 是否使用插件仓库、默认为false、如果需要使用,则需要在当前路径下创建plugin-registry.xml文件并设置为true -->
 <offline/>
 <!-- 是否在离线状态下运行,如果系统需要在离线状态下运行,则设置为true,默认为false -->
 <pluginGroups>
    <pluginGroup>org.mortbay.jetty</pluginGroup>
 </pluginGroups>
 <!-- 插件组,当插件的groupId没有显式提供时,供搜寻插件(groupId)的列表 -->
 <!-- 入上述代码,包含了org.mortbay.jetty 的插件,例如,当我们需要执行该插件的run目标时,可以执行org.mortbay.jetty:jetty-maven-plugin:run,又或者可以简化成mvn jetty:run -->
 <servers>
    <server>
        <id>server001</id> <!-- 服务ID,和仓库ID关联 -->
        <username>my_login</username> <!-- 用户名 -->
        <password>my_password</password> <!-- 密码 -->
        <privateKey>${user.home}/.ssh/id_dsa</privateKey> <!-- 私钥路径 -->
        <passphrase>some_passphrase</passphrase> <!-- 私钥密码 -->
        <filePermissions>664</filePermissions> <!-- 文件被创建权限-->
        <directoryPermissions>775</directoryPermissions> <!-- 文件夹被创建权限 -->
        <configuration></configuration>
    </server>
 </servers>
 <!-- 服务配置,主要是针对需要鉴权的仓库的配置,有些仓库默认匿名用户可以访问,但是可能存在一些私服需要对用户进行鉴权,有相关权限的用户才可以继续访问或者操作。 -->
 <mirrors/>
    <mirror>
        <id>alimaven</id>
        <name>aliyun maven</name>
        <url>http://maven.aliyun.com/nexus/content/groups/public/</url>
        <mirrorOf>central</mirrorOf>
            <!-- - 表示所有
            external:- = 所有不在本地、不适用file://协议的
            repo,repo1 = repo和repo1仓库
            *,!repo1 = 所有的仓库,除了repo1 -->
    </mirror>
</mirrors>
 <!-- 镜像地址,对仓库地址的一种映射关系,国外的仓库地址可能不是很稳定,类似于AliBaBa和OSchina搭建的镜像地址,我们可以配置镜像地址,使得访问速度更快 -->
<proxies>
    <proxy>
        <id>myproxy</id> <!-- 代理ID,唯一性即可-->
        <active>true</active> <!-- 是否激活,激活了就可以使用该代理-->
        <protocol>http</protocol>
        <host>proxy.somewhere.com</host>
        <port>8080</port> <!-- 协议、主机、端口-->
        <username>proxyuser</username>
        <password>somepassword</password>
        <nonProxyHosts>*.google.com|ibiblio.org</nonProxyHosts> <!-- 不代理的主机,中间用竖划线区分-->
    </proxy>
</proxies>
<!-- 代理,主要是为了便于在各自网络环境下使用 -->
 <profiles/>
 <activeProfiles/>
<!-- profile,拥有多套环境,可以根据参数任意切换,如需使用需要在activeProfiles中加入该profile的ID。
包含了activation, repositories, pluginRepositories和properties四种元素,其中activation就类似于properties,就和一个KV对一般,剩下的就是仓库和插件了 -->
<repositories>
 <repository>
    <id>codehausSnapshots</id> <!-- 仓库ID 需唯一 -->
    <name>Codehaus Snapshots</name> <!-- 仓库名称 -->
    <releases> <!-- 正式版本一-->
        <enabled>false</enabled> <!-- 是否可正常使用 -->
        <updatePolicy>always</updatePolicy> <!-- 更新策略 -->
            <!-- always 总是更新
            daily 每天更新一次(默认值)
            interval:X X分钟更新一次
            never 永远都不更新 -->
        <checksumPolicy>warn</checksumPolicy> <!-- 校验策略,分为ignore、fail、warn -->
    </releases>
    <snapshots>
        <enabled>true</enabled>
        <updatePolicy>never</updatePolicy>
        <checksumPolicy>fail</checksumPolicy>
    </snapshots>
    <url>http://snapshots.maven.codehaus.org/maven2</url>
    <!-- 仓库地址,按protocol://hostname/path形式 -->
    <layout>default</layout> <!-- -->
 </repository>
</repositories>
<!-- 仓库的配置,其中包含了快照版本SNAPSHOT和发布版本RELEASE -->
</settings>
2
3
4
5
6
7
8
9
10
11
12
13
14
15
16
17
18
19
20
21
22
23
24
25
26
27
28
29
30
31
32
33
34
35
36
37
38
39
40
41
42
43
44
45
46
47
48
49
50
51
52
53
54
55
56
57
58
59
60
61
62
63
64
65
66
67
68
69
70
71
72
73
74
75
76
77
78
79
80
81
82
83
84
85
# 坐标和依赖
# 坐标详解
- *groupId- (必选)定义当前maven项目隶属的实际项目
- *artifactId- (必选)实际项目中的一个maven模块
- *version- (必选)版本号
- *packaging- (可选)打包方式,常用的分为jar和war包,插件则是maven-plugin,默认为jar包
- *classifier- (不可直接定义)帮助定义构建出的一些附属构建,例如source和对应的doc
# scope就是依赖的范围
compile,默认值,适用于所有阶段(开发、测试、部署、运行),本jar会一直存在所有阶段。provided,只在开发、测试阶段使用,目的是不让Servlet容器和你本地仓库的jar包冲突 。如servlet.jar。runtime,只在运行时使用,如JDBC驱动,适用运行和测试阶段。test,只在测试时使用,用于编译和运行测试代码。不会随项目发布。system,类似provided,需要显式提供包含依赖的jar,Maven不会在Repository中查找它。import导入依赖范围optional依赖是否为可选,确认依赖是否被继承exclusions排除传递性依赖
# 依赖调解
- 第一原则:最短路径优先
上述例子中会使用X2.0版本,但是这并不能解决所有的问题,例如又有如下的依赖关系A->B->D(1.0),A->B->D(2.0),使用最短路径则出现的了不确定性
- 第二原则:第一声明者优先
这个例子中,如果D1.0版本在pom中更加靠前,则会使用D1.0版本
# 可选依赖
确认依赖是否被继承,如下图所示,如果B有optional元素的依赖则表示该元素是可选依赖,从A出发的依赖传递性就被打破了,A无法依赖X,Y了,一般情况下,也不怎么使用该情况
# 生命周期和插件
软件开发的整个过程也是有生命周期的,开发、编译、测试以及部署,而maven的生命周期就是为了所有对象构建过程进行的抽象和统一。maven的生命周期包含了项目的清理、初始化、编译、测试、打包以及集成测试,和最后的验证和部署操作。
- maven-compiler-plugin 编译使用的插件
- maven-surefire-plugin 测试使用的插件
- maven-deploy-plugin 部署使用的插件
# maven-install
# 跳过测试阶段
maven install打包时,默认会执行测试方法,如果测试失败则打包失败,所以在打包时可以跳过测试。共有两种方法:
- (1)命令方式
mvn install -Dmaven.test.skip = true
- (2)配置文件方式
在maven构建包依赖配置文件pom.xml的project元素中添加jar包maven-surefire-plugin,并配置。
<build>
    <plugins>
      <plugin>
        <groupId>org.apache.maven.plugins</groupId>
        <artifactId>maven-surefire-plugin</artifactId>
        <configuration>
          <skip>true</skip>
        </configuration>
      </plugin>
    </plugins>
  </build>
2
3
4
5
6
7
8
9
10
11
# 打包springboot项目
spring-boot工程打包编译时,会生成两种jar包,一种是普通的jar,另一种是可执行jar。默认情况下,这两种jar的名称相同,在不做配置的情况下,普通的jar先生成,可执行jar后生成,所以可执行jar会覆盖普通的jar。
修改pom文件:此时打包出来的ffaith-cloud-comm-1.0-exec.jar(可执行),ffaith-cloud-comm-1.0.jar(可依赖)
<build>
        <plugins>
            <plugin>
                <groupId>org.springframework.boot</groupId>
                <artifactId>spring-boot-maven-plugin</artifactId>
                <configuration>
                    <classifier>exec</classifier>
                </configuration>
            </plugin>
        </plugins>
    </build>
2
3
4
5
6
7
8
9
10
11
# 聚合和继承
此小节主要是涉及到多模块下的各个POM文件的关系。一个项目中如果存在多个模块,就会使得一个父POM挂着多个子POM。
如果实际开发中,只是单独开发子模块,并不关心父模块,所以在引用父模块的时候需要指定父POM的路径,使用relativePath关键字
因为存在父亲模块,所以子模块只需要继承父POM引入的各种jar包,无需再次引入,类似于springboot、junit等模块,存在父POM即可。
不过,同时又有另一种情况的存在,例如新加入的子模块,无需引入上述模块,应该如何处理呢?
POM中的dependencyManagement元素既可以让子模块继承父模块的配置,也可以保证子模块的灵活。
<properties>
 <spring.version>5.1.8.RELEASE</spring.version>
</properties>
<dependencyManagement>
 <dependencies>
 <dependency>
 <groupId>org.springframework</groupId>
 <artifactId>spring-core</artifactId>
 <version>${spring.version}</version>
 </dependency>
 <dependency>
 <groupId>org.springframework</groupId>
 <artifactId>spring-beans</artifactId>
 <version>${spring.version}</version>
 </dependency>
 </dependencies>
</dependencyManagement>
2
3
4
5
6
7
8
9
10
11
12
13
14
15
16
17
<dependencies>
 <dependency>
 <groupId>org.springframework</groupId>
 <artifactId>spring-core</artifactId>
 </dependency>
 <dependency>
 <groupId>org.springframework</groupId>
 <artifactId>spring-beans</artifactId>
 </dependency>
</dependencies>
2
3
4
5
6
7
8
9
10
# Maven parent.relativePath
<parent>
    <groupId>org.springframework.boot</groupId>
    <artifactId>spring-boot-starter-parent</artifactId>
    <version>1.5.6.RELEASE</version>
    <relativePath /> <!-- lookup parent from repository -->
</parent>
2
3
4
5
6
设定一个空值将始终从仓库中获取,不从本地路径获取,如
<parent>
        <groupId>com.clm</groupId>
        <artifactId>ht-nacos</artifactId>
        <version>0.0.1-SNAPSHOT</version>
        <relativePath>../pom.xml</relativePath> <!-- lookup parent from repository -->
    </parent>
2
3
4
5
6
relativePath元素中的地址–本地仓库–远程仓库
# 多模块项目jar包统一管理
1.新建一个module,只有一个pom文件,来统一管理依赖的jar包
<?xml version="1.0" encoding="UTF-8"?>
<project xmlns="http://maven.apache.org/POM/4.0.0"
         xmlns:xsi="http://www.w3.org/2001/XMLSchema-instance"
         xsi:schemaLocation="http://maven.apache.org/POM/4.0.0 http://maven.apache.org/xsd/maven-4.0.0.xsd">
    <modelVersion>4.0.0</modelVersion>

    <groupId>com.clm</groupId>
    <artifactId>com-clm-dependencies</artifactId>
    <version>1.0.0</version>
    <packaging>pom</packaging>

    <properties>
        <alibaba.fastjson.version>1.2.59</alibaba.fastjson.version>
        <spring.cloud.turbine.version>1.4.7.RELEASE</spring.cloud.turbine.version>
        <spring.cloud.hystrix.version>1.4.7.RELEASE</spring.cloud.hystrix.version>
        <spring.cloud.feign.version>1.4.7.RELEASE</spring.cloud.feign.version>
        <springfox.swagger.version>2.9.2</springfox.swagger.version>
        <ctrip.apollo.version>1.4.0</ctrip.apollo.version>
        <google.guava.version>28.0-jre</google.guava.version>
    </properties>

    <dependencyManagement>
        <dependencies>
            <!-- https://mvnrepository.com/artifact/com.alibaba/fastjson -->
            <dependency>
                <groupId>com.alibaba</groupId>
                <artifactId>fastjson</artifactId>
                <version>${alibaba.fastjson.version}</version>
            </dependency>

            <!-- https://mvnrepository.com/artifact/org.springframework.cloud/spring-cloud-starter-turbine -->
            <dependency>
                <groupId>org.springframework.cloud</groupId>
                <artifactId>spring-cloud-starter-turbine</artifactId>
                <version>${spring.cloud.turbine.version}</version>
            </dependency>
            <!-- https://mvnrepository.com/artifact/org.springframework.cloud/spring-cloud-starter-hystrix -->
            <dependency>
                <groupId>org.springframework.cloud</groupId>
                <artifactId>spring-cloud-starter-hystrix</artifactId>
                <version>${spring.cloud.hystrix.version}</version>
            </dependency>
            <dependency>
                <groupId>org.springframework.cloud</groupId>
                <artifactId>spring-cloud-starter-hystrix-dashboard</artifactId>
                <version>${spring.cloud.hystrix.version}</version>
            </dependency>
            <!-- https://mvnrepository.com/artifact/org.springframework.cloud/spring-cloud-starter-feign -->
            <dependency>
                <groupId>org.springframework.cloud</groupId>
                <artifactId>spring-cloud-starter-feign</artifactId>
                <version>${spring.cloud.feign.version}</version>
            </dependency>
            <!-- https://mvnrepository.com/artifact/com.google.guava/guava -->
            <dependency>
                <groupId>com.google.guava</groupId>
                <artifactId>guava</artifactId>
                <version>${google.guava.version}</version>
            </dependency>

            <!-- https://mvnrepository.com/artifact/io.springfox/springfox-swagger-ui -->
            <dependency>
                <groupId>io.springfox</groupId>
                <artifactId>springfox-swagger-ui</artifactId>
                <version>${springfox.swagger.version}</version>
            </dependency>
            <!-- https://mvnrepository.com/artifact/io.springfox/springfox-swagger2 -->
            <dependency>
                <groupId>io.springfox</groupId>
                <artifactId>springfox-swagger2</artifactId>
                <version>${springfox.swagger.version}</version>
            </dependency>
            <!-- https://mvnrepository.com/artifact/com.ctrip.framework.apollo/apollo-openapi 携程-->
            <dependency>
                <groupId>com.ctrip.framework.apollo</groupId>
                <artifactId>apollo-openapi</artifactId>
                <version>${ctrip.apollo.version}</version>
            </dependency>
        </dependencies>
    </dependencyManagement>
</project>
2
3
4
5
6
7
8
9
10
11
12
13
14
15
16
17
18
19
20
21
22
23
24
25
26
27
28
29
30
31
32
33
34
35
36
37
38
39
40
41
42
43
44
45
46
47
48
49
50
51
52
53
54
55
56
57
58
59
60
61
62
63
64
65
66
67
68
69
70
71
72
73
74
75
76
77
78
79
80
81
父级pom中添加为module
<modules>
        <module>nacos-server</module>
        <module>nacos-consumer</module>
        <module>nacos-config</module>
        <module>nacos-consumer-hystrix</module>
        <module>nacos-hystrix-dashboard</module>
        <module>nacos-turbine</module>
        <module>nacos-sentinel</module>
        <module>com-clm-dependencies</module>
    </modules>
2
3
4
5
6
7
8
9
10
其他需要引用统一管理的jar包的module可做如下设置
此时父级pom文件还需添加如下代码:
<dependencyManagement>
        <dependencies>
            <dependency>
                <groupId>org.springframework.cloud</groupId>
                <artifactId>spring-cloud-dependencies</artifactId>
                <version>${spring.cloud.version}</version>
                <type>pom</type>
                <scope>import</scope>
            </dependency>
            <dependency>
                <groupId>com.alibaba.cloud</groupId>
                <artifactId>spring-cloud-alibaba-dependencies</artifactId>
                <version>${spring.cloud.alibaba.version}</version>
                <type>pom</type>
                <scope>import</scope>
            </dependency>
            <dependency>
                <groupId>com.clm</groupId>
                <artifactId>com-clm-dependencies</artifactId>
                <version>${com.clm.version}</version>
                <type>pom</type>
                <scope>import</scope>
            </dependency>
        </dependencies>
    </dependencyManagement>
2
3
4
5
6
7
8
9
10
11
12
13
14
15
16
17
18
19
20
21
22
23
24
25
<parent>
        <groupId>com.clm</groupId>
        <artifactId>ht-nacos</artifactId>
        <version>0.0.1-SNAPSHOT</version>
        <relativePath>../pom.xml</relativePath> <!-- lookup parent from repository -->
    </parent>
2
3
4
5
6
写成这样,就会默认先从本地,然后远程仓库。至此已经统一管理了jar包,需要引用jar的module则可以不用写版本号(version)了。如下:
<dependency>
            <groupId>io.springfox</groupId>
            <artifactId>springfox-swagger-ui</artifactId>
        </dependency>
        <dependency>
            <groupId>io.springfox</groupId>
            <artifactId>springfox-swagger2</artifactId>
        </dependency>
    </dependencies>
2
3
4
5
6
7
8
9
# 添加本地jar包
- 一般spring工程
<dependency>
        <groupId>RXTXcomm</groupId>
        <artifactId>RXTXcomm</artifactId>
        <version>1.0</version>
        <scope>system</scope>
        <systemPath>${basedir}\WebContent\WEB-INF\lib\RXTXcomm.jar</systemPath>
    </dependency>
2
3
4
5
6
7
- springboot工程
<dependency>
        <groupId>RXTXcomm</groupId>
        <artifactId>RXTXcomm</artifactId>
        <version>1.0</version>
        <scope>system</scope>
        <systemPath>${project.basedir}\src\main\resources\lib\RXTXcomm.jar</systemPath>
    </dependency>
2
3
4
5
6
7
maven install时要将本地的jar包打入工程中,需做如下配置:
pom.xml文件中找到spring-boot-maven-plugin插件
<configuration>
    <includeSystemScope>true</includeSystemScope>
</configuration>
2
3
# versions-maven-plugin
# maven-dependency-plugin插件
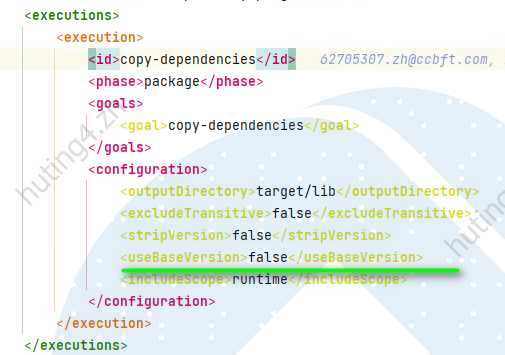
# useBaseVersion
useBaseVersion 是 Maven 的一个配置选项,通常用于处理依赖或插件中 SNAPSHOT 版本的解析行为。它决定了 Maven 在引用 SNAPSHOT 依赖或插件时,是否使用原始的 base version(即 artifactId-x.y-SNAPSHOT)还是带有时间戳的唯一版本(artifactId-x.y-timestampedVersion)。
示例配置:
<plugin>
    <groupId>org.apache.maven.plugins</groupId>
    <artifactId>maven-dependency-plugin</artifactId>
    <version>3.5.0</version>
    <executions>
        <execution>
            <id>copy-dependencies</id>
            <phase>package</phase>
            <goals>
                <goal>copy-dependencies</goal>
            </goals>
            <configuration>
                <outputDirectory>${project.build.directory}/lib</outputDirectory>
                <useBaseVersion>true</useBaseVersion>
            </configuration>
        </execution>
    </executions>
</plugin>
2
3
4
5
6
7
8
9
10
11
12
13
14
15
16
17
18
# useBaseVersion 的意义
- useBaseVersion = true (默认值) Maven 会使用依赖或插件的 base version 名称,例如 artifactId-x.y-SNAPSHOT,而不是解析后的时间戳版本。
目标文件名:artifactId-x.y-SNAPSHOT.jar
- useBaseVersion = false Maven 会使用带时间戳的唯一版本名称(具体取决于远程仓库中的 SNAPSHOT 解析规则)。
目标文件名:artifactId-x.y-20241114.123456-1.jar
# 适用场景
useBaseVersion = true: 使用原始 SNAPSHOT 名称,通常用于开发阶段或需要将 SNAPSHOT 名称显式保留下来的情况。
useBaseVersion = false: 使用带时间戳的版本,通常用于更严格的版本管理场景,确保部署或构建时明确依赖的唯一版本。
# 注意事项
使用范围: useBaseVersion 主要用于 Maven 插件(如 maven-dependency-plugin)中,并不会影响 pom.xml 中的依赖解析逻辑。
与远程仓库的配合: 如果远程仓库中只有时间戳版本的 SNAPSHOT,useBaseVersion = true 的配置可能导致构建失败,因为 Maven 会找不到原始 SNAPSHOT 名称的文件。
# 总结
默认值:useBaseVersion = true,使用 artifactId-x.y-SNAPSHOT 格式。
修改影响:设置为 false 时,Maven 会使用时间戳版本,通常适用于需要唯一版本的场景。
# 国内镜像
这里提供下国内牛逼的Maven镜像 阿里云Maven镜像;
配置下setting.xml即可;
<mirrors>
    <mirror>
      <id>alimaven</id>
      <name>aliyun maven</name>
      <url>http://maven.aliyun.com/nexus/content/groups/public/</url>
      <mirrorOf>central</mirrorOf>
    </mirror>
  </mirrors>
2
3
4
5
6
7
8
我们打开eclipse 然后windows-Preferences 然后Maven - User Settings
Idea类似做更改
# git-commit-id-plugin
# 问题集锦
Non-resolvable parent POM: Could not find artifact com.ecp:ecp-main:pom:0.0.1-SNAPSHOT and 'parent.relativePath' points at wrong local POM @ line 8, column 10 -> [Help 2]
原因:
多模块项目构建时,先将parent项目要先install一回,之后子项目才可以运行mvn compile命令,否则就会报如上异常。
failed to Delete 目录:/target/lib/xxxx.jar
原因排查: 可手动去相应路径下进行删除操作,若提示某程序占用,则停止该程序即可(基本都是因为被程序占用,如tomcat未停止就执行clean)