# 完美 CSS
# 毛玻璃
.card {
  background: rgba(255, 255, 255, 0.7);
  -webkit-backdrop-filter: blur(10px);
  backdrop-filter: blur(10px);
}
2
3
4
5
# CSS3 特色横幅显示
.featureBanner {
  position: relative;
  margin: 20px;
}
.featureBanner:before {
  content: "Featured";
  position: absolute;
  top: 5px;
  left: -8px;
  padding-right: 10px;
  color: #232323;
  font-weight: bold;
  height: 0px;
  border: 15px solid #ffa200;
  border-right-color: transparent;
  line-height: 0px;
  box-shadow: -0px 5px 5px -5px #000;
  z-index: 1;
}
.featureBanner:after {
  content: "";
  position: absolute;
  top: 35px;
  left: -8px;
  border: 4px solid #89540c;
  border-left-color: transparent;
  border-bottom-color: transparent;
}
2
3
4
5
6
7
8
9
10
11
12
13
14
15
16
17
18
19
20
21
22
23
24
25
26
27
28
# 内圆角
1.outline 描边特性
.wrap {
  background: #d3941e;
  border-radius: 8px;
  width: 200px;
  height: 80px;
  margin: 100px auto;
  box-shadow: 0 0 0 8px #754906;
  outline: 8px solid #754906;
}
.wrap-special {
  outline: 6px solid #754906;
}
2
3
4
5
6
7
8
9
10
11
12
<div class="wrap"></div>
<div class="wrap wrap-special"></div>
2
# 阴影
- 1.box-shadow 叠加
div {
  width: 200px;
  height: 80px;
  text-align: center;
  line-height: 80px;
  background: rgb(201, 125, 26);
  margin: 100px auto;
  color: #fff;
}
.shadow-bottom {
  box-shadow: 0 5px 5px rgb(124, 74, 8);
}
.shadow-slide {
  box-shadow: 5px 0 5px rgb(124, 74, 8), -5px 0 5px rgb(124, 74, 8);
}
.shadow-right-top {
  box-shadow: 0 -5px 5px rgb(124, 74, 8), 5px 0 5px rgb(124, 74, 8);
}
2
3
4
5
6
7
8
9
10
11
12
13
14
15
16
17
18
<div class="shadow-bottom">单边阴影</div>
<div class="shadow-slide">左右阴影</div>
<div class="shadow-right-top">右上角阴影</div>
2
3
# 折角
- 1.切角轴为 45° 切(正切)
- 2.第一层折角效果 “/”的使用以及 size 的计算(关联 ① 计算)
div {
  width: 200px;
  height: 80px;
  text-align: center;
  line-height: 80px;
  margin: 100px auto;
  color: #fff;
}
.corner-cut1 {
  background: #58a; /* 优雅降级 */
  background: linear-gradient(-135deg, transparent 50%, rgba(0, 0, 0, 0.4) 0) no-repeat
      100% 0 / 30px 30px, linear-gradient(-135deg, transparent 20px, #58a 0);
}
2
3
4
5
6
7
8
9
10
11
12
13
<div class="corner-cut1">折角</div>
# 切角
- 1.linear-gradient 累加为一层
- 2.background-size 控制数量
- 3.transparent 控制大小
div {
  width: 200px;
  height: 80px;
  text-align: center;
  line-height: 80px;
  margin: 100px auto;
  color: #fff;
}
/*
  知识点:
  linear-gradient 每加一个为累加一层

  background-size:
  单角一层不用
  双角 50% 100%;
  三角 50% 50%; (切角宽度 transparent 0)
  全角 50% 50%;
*/
.corner-cut1 {
  background: rgb(201, 125, 26); /*compatibility*/
  background: linear-gradient(-45deg, transparent 15px, rgb(201, 125, 26) 0);
}
.corner-cut-all {
  background: rgb(201, 125, 26); /*compatibility*/
  background: linear-gradient(135deg, transparent 15px, rgb(201, 125, 26) 0) top
      left, linear-gradient(225deg, transparent 15px, rgb(201, 125, 26) 0) top right,
    linear-gradient(45deg, transparent 15px, rgb(201, 125, 26) 0) bottom left, linear-gradient(
        -45deg,
        transparent 15px,
        rgb(201, 125, 26) 0
      ) bottom right;
  /* transparent 15px 越大切角越大 */
  /* 四切角 关系为90deg */
  /* 切角读书以上下边为起点 默认90deg */
  background-size: 50% 50%; /* 类设置图片尺寸 使每一渐变层只占元素的1/2 从而不覆盖transparent的角度 */
  background-repeat: no-repeat;
}
2
3
4
5
6
7
8
9
10
11
12
13
14
15
16
17
18
19
20
21
22
23
24
25
26
27
28
29
30
31
32
33
34
35
36
37
<div class="corner-cut1">切角</div>
<div class="corner-cut-all">全切角</div>
2
# 平行四边形
<!DOCTYPE html>
<html lang="en">
  <head>
    <meta charset="UTF-8" />
    <meta name="viewport" content="width=device-width, initial-scale=1.0" />
    <meta http-equiv="X-UA-Compatible" content="ie=edge" />
    <title>Document</title>
    <style>
      .react {
        margin-left: 100px;
        width: 300px;
        height: 50px;
        line-height: 50px;
        text-align: center;
        background: #ddd;
        transform: skewX(-45deg);
      }
      .text {
        display: inline-block;
        transform: skewX(45deg);
      }
    </style>
  </head>

  <body>
    <div class="react">
      <span class="text">React前端技术</span>
    </div>
  </body>
</html>
2
3
4
5
6
7
8
9
10
11
12
13
14
15
16
17
18
19
20
21
22
23
24
25
26
27
28
29
30
<!DOCTYPE html>
<html lang="en">
  <head>
    <meta charset="UTF-8" />
    <meta name="viewport" content="width=device-width, initial-scale=1.0" />
    <meta http-equiv="X-UA-Compatible" content="ie=edge" />
    <title>Document</title>
    <style>
      .vue {
        margin-left: 100px;
        position: relative;
        width: 300px;
        height: 50px;
        line-height: 50px;
        text-align: center;
      }
      .vue::before {
        position: absolute;
        top: 0;
        left: 0;
        bottom: 0;
        right: 0;
        content: "";
        background: #ddd;
        z-index: -1;
        transform: skewX(-45deg);
      }
    </style>
  </head>

  <body>
    <div class="vue">Vue前端技术</div>
  </body>
</html>
2
3
4
5
6
7
8
9
10
11
12
13
14
15
16
17
18
19
20
21
22
23
24
25
26
27
28
29
30
31
32
33
34
# 毛玻璃 2
- 1.filter 与定位的位置关系
- 2.blur 高斯模糊
- 3.模糊蒙版继承父级容器宽高
.pub-position {
  position: absolute;
  left: 0;
  top: 0;
  right: 0;
  bottom: 0;
  margin: auto;
}
.glass-wrap {
  width: 325px;
  height: 185px;
  margin: 200px auto;
  background: url("../images/glass.jpg") no-repeat;
  background-size: contain;
  position: relative;
}
.word-wrap,
.content {
  width: 200px;
  height: 80px;
  text-align: center;
  line-height: 80px;
  overflow: hidden;
  color: #fff;
}
/* 这里使用同级元素解决文字容器做滤镜被覆盖的问题 */
.word-wrap::before {
  content: "";
  width: 325px;
  height: 185px;
  position: absolute;
  left: -10px; /* 这个值影响背景图片的位置 */
  top: 0;
  right: 0;
  bottom: 0;
  margin: auto;
  filter: blur(10px);
  background: url("../images/glass.jpg") no-repeat -52.5px 0;
  background-size: contain;
}
2
3
4
5
6
7
8
9
10
11
12
13
14
15
16
17
18
19
20
21
22
23
24
25
26
27
28
29
30
31
32
33
34
35
36
37
38
39
40
<div class="glass-wrap">
  <div class="pub-position word-wrap"></div>
  <p class="pub-position content">模糊玻璃</p>
</div>
2
3
4
# 另一种方法实现毛玻璃
先铺满全屏背景,然后承载主要内容的元素半透明,且有一个伪元素,此伪元素也是有一个background-attachment: fixe 的背景,并且把它加上 blur 即可实现
.bg,
.container::before {
  background-image: url("http://img2.imgtn.bdimg.com/it/u=1737072847,1699534261&fm=26&gp=0.jpg");
  background-repeat: no-repeat;
  background-size: cover;
  background-attachment: fixed;
}
.bg {
  top: 0;
  left: 0;
  right: 0;
  bottom: 0;
  position: absolute;
  z-index: -1;
}

.container::before {
  content: "";
  filter: blur(20px);
  z-index: -1;
}

.container {
  background: rgba(0, 0, 0, 0.5);
  color: #fff;
  font-size: 30px;
  /* 用transform会悲剧哦 */
  left: calc(50% - 250px);
  top: calc(50% - 200px);
}

.container,
.container::before {
  width: 500px;
  height: 400px;
  position: absolute;
  border-radius: 8px;
}
2
3
4
5
6
7
8
9
10
11
12
13
14
15
16
17
18
19
20
21
22
23
24
25
26
27
28
29
30
31
32
33
34
35
36
37
38
- background-attachment: fixed。这个可以使得背景相对于视窗是固定的,否则一般情况下,图片会从你的盒子左上角开始,而不是像图中的效果一样
calc(50% - 250px)居中: 使用 transform 的话,偏移会导致伪元素的背景和内容不统一,调起来也麻烦,直接 calc 最快
# CSS 实现标签效果
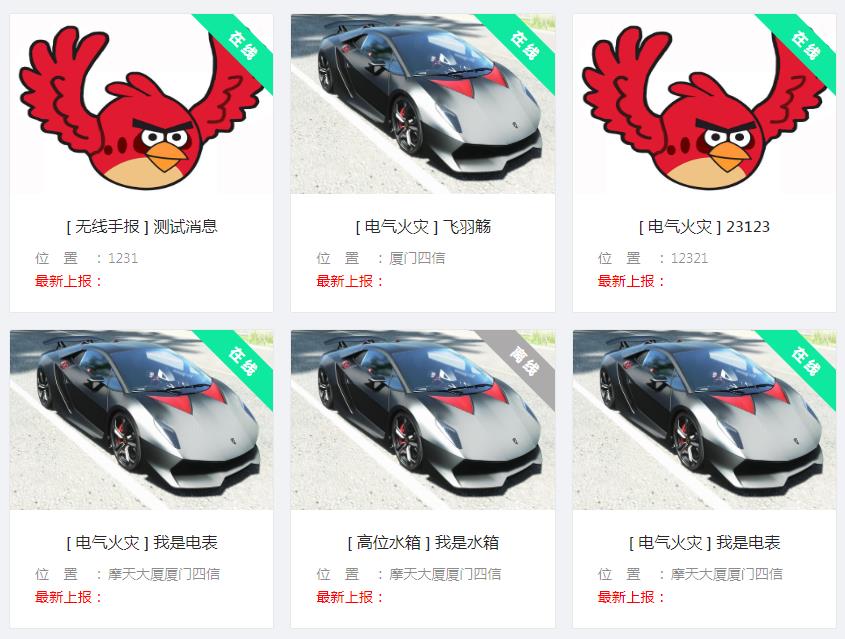
- 实现思路
- 准备两个 div(一个父容器,一个标签 div),分别
设置宽高,并设置相对布局。 - 使标签 div 居于父容器右上角,设置内容居中显示,设置背景和字体颜色,
旋转该div。 - 将
父容器设置overflow: hidden,实现父容器对标签 div 超出部分的遮挡,即实现了标签效果。
- 准备两个 div(一个父容器,一个标签 div),分别
<!DOCTYPE html>
<html>
  <head>
    <meta charset="utf-8" />
    <title>实现标签效果</title>
    <style>
      /* 外层div
   设为relative
   设置overflow: hidden实现对超出部分的 遮挡效果
 */
      .img-box {
        width: 200px;
        height: 400px;
        margin: 40px;
        overflow: hidden;
        position: relative;
      }
      /* 外层div
   设为absolute,加以top、right等属性调整标签位置
   设置height、line-height、text-align控制标签内容水平垂直居中
   设置transform,旋转标签45度
 */
      .tag {
        width: 140px;
        height: 25px;
        top: 16px;
        right: -40px;
        text-align: center;
        line-height: 25px;
        transform: rotate(45deg);
        position: absolute;
        color: white;
        background: #4188ab;
      }
      /* 图片展示 设为block */
      .img {
        display: block;
        width: 200px;
        height: 400px;
      }
    </style>
  </head>

  <body>
    <div class="img-box">
      <div class="tag">正在使用</div>
      <img class="img" src="..." />
    </div>
  </body>
</html>
2
3
4
5
6
7
8
9
10
11
12
13
14
15
16
17
18
19
20
21
22
23
24
25
26
27
28
29
30
31
32
33
34
35
36
37
38
39
40
41
42
43
44
45
46
47
48
49
50
# 逆天了 CSS
# 输入框特效
# 划线动态
:before和:after伪元素指定了一个元素文档树内容之前和之后的内容。由于 input 标签不是可插入内容的容器。所以这里下划线无法通过伪元素来实现。需要借助其他 dom 节点。
<div>
  <input type="text" />
  <span></span>
</div>
2
3
4
包裹在外的父元素 div 应该设置成
inline-block,否则宽度会满屏。
div {
  position: relative;
  display: inline-block;
}
2
3
4
input 标签需要
禁用默认样式:
input {
  outline: none;
  border: none;
  background: #fafafa;
}
2
3
4
5
span 标签实现「左进右出」的动态,需要
改变transform-origin方向。为了避免回流重绘,通过 scaleX 来实现宽度变化的视觉效果
input ~ span {
  position: absolute;
  left: 0;
  right: 0;
  bottom: 0;
  height: 1px;
  background-color: #262626;
  transform: scaleX(0);
  transform-origin: right center;
  transition: transform 0.3s ease-in-out;
}

input:focus ~ span {
  transform: scaleX(1);
  transform-origin: left center;
}
2
3
4
5
6
7
8
9
10
11
12
13
14
15
16
# 动态边框
有 4 条边框。所以除了 input 元素外,还需要准备其他 4 个 dom。为了方便定位,嵌套一个父级元素。
<div>
  <input type="text">
  <span class="bottom"></span>
  <span class="right"></span>
  <span class="top"></span>
  <span>
</div>
2
3
4
5
6
7
div {
  position: relative;
  display: inline-block;
  padding: 3px;
}

input {
  outline: none;
  border: none;
  background: #fafafa;
  padding: 3px;
}
2
3
4
5
6
7
8
9
10
11
12
对于其他 4 个 span 元素,它们的位置属性,动画属性,以及颜色都是相同的:
.bottom,
.top,
.left,
.right {
  position: absolute;
  background-color: #262626;
  transition: transform 0.1s ease-in-out;
}
2
3
4
5
6
7
8
对于.bottom 和.top,它们的变化方向是水平;对于.left 和.right,它们的变化方向是垂直
.bottom,
.top {
  left: 0;
  right: 0;
  height: 1px;
  transform: scaleX(0);
}

.left,
.right {
  top: 0;
  bottom: 0;
  width: 1px;
  transform: scaleY(0);
}
2
3
4
5
6
7
8
9
10
11
12
13
14
15
下面就是处理延时的特效。动态图中,动画按照下、右、上、左的顺序依次变化。借助的是 transition-delay 属性,来实现动画延迟
.bottom {
  bottom: 0;
  transform-origin: right center;
}
input:focus ~ .bottom {
  transform: scaleX(1);
  transform-origin: left center;
}

.top {
  top: 0;
  transform-origin: left center;
  transition-delay: 0.2s;
}
input:focus ~ .top {
  transform: scaleX(1);
  transform-origin: right center;
}

.right {
  transform-origin: top center;
  right: 0;
  transition-delay: 0.1s;
}
input:focus ~ .right {
  transform: scaleY(1);
  transform-origin: bottom center;
}

.left {
  left: 0;
  transform-origin: bottom center;
  transition-delay: 0.3s;
}
input:focus ~ .left {
  transform: scaleY(1);
  transform-origin: top center;
}
2
3
4
5
6
7
8
9
10
11
12
13
14
15
16
17
18
19
20
21
22
23
24
25
26
27
28
29
30
31
32
33
34
35
36
37
38
# 撩人的按钮特效
# 气泡特效
button {
  outline: none;
  border: none;
  cursor: pointer;
  color: white;
  position: relative;
  padding: 0.5em 1em;
  background-color: #40a9ff;
}
2
3
4
5
6
7
8
9
由于 button 的伪元素层级是覆盖 button 的,所以要设置 z-index 属性,防止伪元素遮盖显示。毕竟只想要背景色的遮盖,字体不需要遮盖。在上面的样式中添加
button {
  z-index: 1;
  overflow: hidden;
}
2
3
4
最后处理的是伪元素的变化效果。特效是从中心向四周蔓延,所以应该让其居中
对于大小变化,还是利用 scale 属性。
因为是圆形,所以将 border-radius 设置为 50%即可
button::before {
  z-index: -1;
  content: "";
  position: absolute;
  top: 50%;
  left: 50%;
  width: 1em;
  height: 1em;
  border-radius: 50%;
  background-color: #9254de;
  transform-origin: center;
  transform: translate3d(-50%, -50%, 0) scale(0, 0);
  transition: transform 0.45s ease-in-out;
}

button:hover::before {
  transform: translate3d(-50%, -50%, 0) scale(15, 15);
}
2
3
4
5
6
7
8
9
10
11
12
13
14
15
16
17
18
# 闪光特效
实现上依然是借助伪元素,闪光特效更多注重的是配色,动画方面实现的核心是利用 rotate 来实现「倾斜」的效果,利用
translate3d来实现「闪动」的效果
button {
  outline: none;
  border: none;
  z-index: 1;
  position: relative;
  color: white;
  background: #262626;
  padding: 0.5em 1em;
  overflow: hidden;
  --shine-width: 1.25em;
}

button::after {
  content: "";
  z-index: -1;
  position: absolute;
  background: #595959;
  /* 核心代码:位置一步步调整 */
  top: -50%;
  left: 0%;
  bottom: -50%;
  width: 1.25em;
  transform: translate3d(-200%, 0, 0) rotate(35deg);
  /*  */
}

button:hover {
  cursor: pointer;
}

button:hover::after {
  transition: transform 0.5s ease-in-out;
  transform: translate3d(500%, 0, 0) rotate(35deg);
}
2
3
4
5
6
7
8
9
10
11
12
13
14
15
16
17
18
19
20
21
22
23
24
25
26
27
28
29
30
31
32
33
34
translate3d 除了避免重绘回流,还能启用 GPU 加速,性能更高。但之前为了方便讲述,一般使用的是 translate 属性。
# 脉冲特效
还是去掉 button 的默认样式。注意设置 button 的 z-index 属性并且让其生效,要保证其大于 ::before 的 z-index 属性,防止 dom 元素被伪元素覆盖
button {
  position: relative;
  z-index: 1;
  border: none;
  outline: none;
  padding: 0.5em 1em;
  color: white;
  background-color: #1890ff;
}

button:hover {
  cursor: pointer;
}
2
3
4
5
6
7
8
9
10
11
12
13
剩下的就是设置伪元素。因为脉冲特效给人的感觉是“镂空”放大。因此,变化对象是 border 属性。而镂空的效果,是通过透明背景来实现的
button::before {
  content: "";
  position: absolute;
  z-index: -1;
  top: 0;
  left: 0;
  bottom: 0;
  right: 0;
  border: 4px solid #1890ff;
  transform: scale(1);
  transform-origin: center;
}
2
3
4
5
6
7
8
9
10
11
12
动画启动时间是鼠标移入,border 上变化的是颜色变淡和大小变小,透明度也逐渐变成 0
button:hover::before {
  transition: all 0.75s ease-out;
  border: 1px solid#e6f7ff;
  transform: scale(1.25);
  opacity: 0;
}
2
3
4
5
6
transition 和 transform 是放在 hover 状态下的伪元素,目的是让动画瞬间回到初始状态
# 果冻特效
button {
  z-index: 1;
  color: white;
  background: #40a9ff;
  outline: none;
  border: none;
  padding: 0.5em 1em;
}

button:hover {
  cursor: pointer;
  animation: jelly 0.5s;
}
2
3
4
5
6
7
8
9
10
11
12
13
下面开始编写 jelly 动画的特效。这个动画可以分解为 4 个部分:「初始 => 挤高 => 压扁 => 回到初始状态」。挤高 和 压扁这里都是通过 scale 来实现的,代码如下
@keyframes jelly {
  0%,
  100% {
    transform: scale(1, 1);
  }

  33% {
    transform: scale(0.9, 1.1);
  }

  66% {
    transform: scale(1.1, 0.9);
  }
}
2
3
4
5
6
7
8
9
10
11
12
13
14
# 更进一步
上面的动态已经仿真不错了,如果将 4 部分变成 5 部分:「初始 => 挤高 => 压扁 => 挤高 => 回到初始状态」。视觉上会有一种弹簧的特效,就像手压果冻后的效果
@keyframes jelly {
  0%,
  100% {
    transform: scale(1, 1);
  }

  25%,
  75% {
    transform: scale(0.9, 1.1);
  }

  50% {
    transform: scale(1.1, 0.9);
  }
}
2
3
4
5
6
7
8
9
10
11
12
13
14
15
# 滑箱特效
因为 button 元素可以使用
before/after伪元素,所以借助伪元素,可以实现动态图中的遮盖层
为了避免回流重绘,滑箱的运动方向是垂直方向,所以使用 scaleY 属性。对于动画的方向,需要借助transform-origin改变动画原点
<button>xin-tan.com</button>
button {
  outline: none;
  border: none;
  z-index: 1;
  position: relative;
  color: white;
  background: #40a9ff;
  padding: 0.5em 1em;
}

button::before {
  content: "";
  z-index: -1;
  position: absolute;
  top: 0;
  bottom: 0;
  left: 0;
  right: 0;
  background-color: #fa541c;
  transform-origin: center bottom;
  transform: scaleY(0);
  transition: transform 0.4s ease-in-out;
}

button:hover {
  cursor: pointer;
}

button:hover::before {
  transform-origin: center top;
  transform: scaleY(1);
}
2
3
4
5
6
7
8
9
10
11
12
13
14
15
16
17
18
19
20
21
22
23
24
25
26
27
28
29
30
31
32
# 霓虹效果
<div id="neon-btn">
  <button class="btn one">Hover me</button>
  <button  class="btn two">Hover me</button>
  <button  class="btn three">Hover me</button>
</div>
2
3
4
5
#neon-btn {
  display: flex;
  align-items: center;
  justify-content: space-around;
  height: 100vh;
  background: #031628;
}

.btn {
  border: 1px solid;
  background-color: transparent;
  text-transform: uppercase;
  font-size: 14px;
  padding: 10px 20px;
  font-weight: 300;
}

.one {
  color: #4cc9f0;
}

.two {
  color: #f038ff;
}

.three {
  color: #b9e769;
}

.btn:hover {
  color: white;
  border: 0;
}

.one:hover {
  background-color: #4cc9f0;
  -webkit-box-shadow: 10px 10px 99px 6px rgba(76,201,240,1);
  -moz-box-shadow: 10px 10px 99px 6px rgba(76,201,240,1);
  box-shadow: 10px 10px 99px 6px rgba(76,201,240,1);
}

.two:hover {
  background-color: #f038ff;
  -webkit-box-shadow: 10px 10px 99px 6px rgba(240, 56, 255, 1);
  -moz-box-shadow: 10px 10px 99px 6px rgba(240, 56, 255, 1);
  box-shadow: 10px 10px 99px 6px rgba(240, 56, 255, 1);
}

.three:hover {
  background-color: #b9e769;
  -webkit-box-shadow: 10px 10px 99px 6px rgba(185, 231, 105, 1);
  -moz-box-shadow: 10px 10px 99px 6px rgba(185, 231, 105, 1);
  box-shadow: 10px 10px 99px 6px rgba(185, 231, 105, 1);
}
2
3
4
5
6
7
8
9
10
11
12
13
14
15
16
17
18
19
20
21
22
23
24
25
26
27
28
29
30
31
32
33
34
35
36
37
38
39
40
41
42
43
44
45
46
47
48
49
50
51
52
53
54
# 边框效条效果
<div id="draw-border">
  <button>Hover me</button>
</div>
2
3
#draw-border {
  display: flex;
  align-items: center;
  justify-content: center;
  height: 100vh;
}

button {
  border: 0;
  background: none;
  text-transform: uppercase;
  color: #4361ee;
  font-weight: bold;
  position: relative;
  outline: none;
  padding: 10px 20px;
  box-sizing: border-box;
}

button::before, button::after {
  box-sizing: inherit;
  position: absolute;
  content: '';
  border: 2px solid transparent;
  width: 0;
  height: 0;
}

button::after {
  bottom: 0;
  right: 0;
}

button::before {
  top: 0;
  left: 0;
}

button:hover::before, button:hover::after {
  width: 100%;
  height: 100%;
}

button:hover::before {
  border-top-color: #4361ee;
  border-right-color: #4361ee;
  transition: width 0.3s ease-out, height 0.3s ease-out 0.3s;
}

button:hover::after {
  border-bottom-color: #4361ee;
  border-left-color: #4361ee;
  transition: border-color 0s ease-out 0.6s, width 0.3s ease-out 0.6s, height 0.3s ease-out 1s;
}
2
3
4
5
6
7
8
9
10
11
12
13
14
15
16
17
18
19
20
21
22
23
24
25
26
27
28
29
30
31
32
33
34
35
36
37
38
39
40
41
42
43
44
45
46
47
48
49
50
51
52
53
54
# 圆形效果铺满特效
<div id="circle-btn">
  <div class="btn-container">
    // 这里有一个svg元素
    <button>Hover me</button>
  </div>
</div>
2
3
4
5
6
#circle-btn {
  display: flex;
  align-items: center;
  justify-content: center;
  height: 100vh;
}

.btn-container {
  position: relative;
}

button {
  border: 0;
  border-radius: 50px;
  color: white;
  background: #5f55af;
  padding: 15px 20px 16px 60px;
  text-transform: uppercase;
  background: linear-gradient(to right, #f72585 50%, #5f55af 50%);
  background-size: 200% 100%;
  background-position: right bottom;
  transition:all 2s ease;
}

svg {
  background: #f72585;
  padding: 8px;
  border-radius: 50%;
  position: absolute;
  left: 0;
  top: 0%;
}

button:hover {
   background-position: left bottom;
}
2
3
4
5
6
7
8
9
10
11
12
13
14
15
16
17
18
19
20
21
22
23
24
25
26
27
28
29
30
31
32
33
34
35
36
# 圆角效果变大特效
<div id="border-btn">
  <button>Hover me</button>
</div>
2
3
#border-btn {
  display: flex;
  align-items: center;
  justify-content: center;
  height: 100vh;
}

button {
  border: 0;
  border-radius: 10px;
  background: #2ec4b6;
  text-transform: uppercase;
  color: white;
  font-size: 16px;
  font-weight: bold;
  padding: 15px 30px;
  outline: none;
  position: relative;
  transition: border-radius 3s;
  -webkit-transition: border-radius 3s;
}

button:hover {
   border-bottom-right-radius: 50px;
   border-top-left-radius: 50px;
   border-bottom-left-radius: 10px;
   border-top-right-radius: 10px;
}
2
3
4
5
6
7
8
9
10
11
12
13
14
15
16
17
18
19
20
21
22
23
24
25
26
27
28
# 冰冻效果
<div id="frozen-btn">
  <button class="green">Hover me</button>
  <button class="purple">Hover me</button>
</div>
2
3
4
#frozen-btn {
  display: flex;
  align-items: center;
  justify-content: center;
  height: 100vh;
}

button {
  border: 0;
  margin: 20px;
  text-transform: uppercase;
  font-size: 20px;
  font-weight: bold;
  padding: 15px 50px;
  border-radius: 50px;
  color: white;
  outline: none;
  position: relative;
}

button:before{
  content: '';
  display: block;
  background: linear-gradient(to left, rgba(255, 255, 255, 0) 50%, rgba(255, 255, 255, 0.4) 50%);
  background-size: 210% 100%;
  background-position: right bottom;
  height: 100%;
  width: 100%;
  position: absolute;
  top: 0;
  bottom:0;
  right:0;
  left: 0;
  border-radius: 50px;
  transition: all 1s;
  -webkit-transition: all 1s;
}

.green {
   background-image: linear-gradient(to right, #25aae1, #40e495);
   box-shadow: 0 4px 15px 0 rgba(49, 196, 190, 0.75);
}

.purple {
   background-image: linear-gradient(to right, #6253e1, #852D91);
   box-shadow: 0 4px 15px 0 rgba(236, 116, 149, 0.75);
}

.purple:hover:before {
  background-position: left bottom;
}

.green:hover:before {
  background-position: left bottom;
}
2
3
4
5
6
7
8
9
10
11
12
13
14
15
16
17
18
19
20
21
22
23
24
25
26
27
28
29
30
31
32
33
34
35
36
37
38
39
40
41
42
43
44
45
46
47
48
49
50
51
52
53
54
55
# 闪亮效果
<div id="shiny-shadow">
  <button><span>Hover me</span></button>
</div>
2
3
#shiny-shadow {
  display: flex;
  align-items: center;
  justify-content: center;
  height: 100vh;
  background: #1c2541;
}

button {
  border: 2px solid white;
  background: transparent;
  text-transform: uppercase;
  color: white;
  padding: 15px 50px;
  outline: none;
  overflow: hidden;
  position: relative;
}

span {
  z-index: 20;
}

button:after {
  content: '';
    display: block;
    position: absolute;
    top: -36px;
    left: -100px;
    background: white;
    width: 50px;
    height: 125px;
    opacity: 20%;
    transform: rotate(-45deg);
}

button:hover:after {
  left: 120%;
  transition: all 600ms cubic-bezier(0.3, 1, 0.2, 1);
   -webkit-transition: all 600ms cubic-bezier(0.3, 1, 0.2, 1);
}
2
3
4
5
6
7
8
9
10
11
12
13
14
15
16
17
18
19
20
21
22
23
24
25
26
27
28
29
30
31
32
33
34
35
36
37
38
39
40
41
# 就用 CSS 送颗心
# 一颗 div 一颗心
<div></div>
div {
  position: relative;
  top: 100px;
  left: 50%;
  width: 100px;
  height: 100px;
  background-color: tomato;
}
2
3
4
5
6
7
8
接着我们利用元素的两个伪元素:before和:after,画出一个蓝色的圆和一个黄色的圆,并且将它们的圆心分别定位在正方形的上边和右边
div:before {
  content: "";
  position: absolute;
  top: -50px;
  left: 0;
  width: 100px;
  height: 100px;
  border-radius: 50%;
  background-color: blue;
}
div:after {
  content: "";
  position: absolute;
  top: 0px;
  left: 50px;
  width: 100px;
  height: 100px;
  background-color: yellow;
  border-radius: 50%;
}
2
3
4
5
6
7
8
9
10
11
12
13
14
15
16
17
18
19
20
再来,将刚刚实现的两个圆变成和正方形一样的颜色
div:before {
  ... background-color: tomato;
}
div:after {
  ... background-color: tomato;
}
2
3
4
5
6
最后,将元素 div 旋转 45 度,我们要的心形就实现了!就是这么简单
div {
  position: relative;
  top: 100px;
  left: 50%;
  width: 100px;
  height: 100px;
  background-color: tomato;
  transform: rotate(-45deg);
}
2
3
4
5
6
7
8
9
# 一颗心不够那我们就画一屏
<h1>爱无处不在...</h1>
<div class="heart"></div>
<div class="heart"></div>
<div class="heart"></div>
<div class="heart"></div>
<div class="heart"></div>
<div class="heart"></div>
<div class="heart"></div>
<div class="heart"></div>
2
3
4
5
6
7
8
9
.heart {
  position: relative;
  width: 100px;
  height: 90px;
  float: left;
}
2
3
4
5
6
.heart:before,
.heart:after {
  position: absolute;
  content: "";
  left: 50px;
  top: 0;
  width: 50px;
  height: 80px;
  background: #fc2e5a;
  border-radius: 50px 50px 0 0;
  transform-origin: 0 100%;
}
.heart:after {
  left: 0;
  transform-origin: 100% 100%;
}
2
3
4
5
6
7
8
9
10
11
12
13
14
15
16
# 爱有多深
<div class="heart"></div>
.heart {
  position: absolute;
  left: 50%;
  top: 50%;
  width: 105px;
  height: 105px;
  margin: -52.5px 0 0 -52.5px;
}
2
3
4
5
6
7
8
.heart::before {
  content: "";
  display: block;
  transition: all 400ms;
  width: 15px;
  height: 15px;
  margin: -15px 0 0 -15px;
  box-shadow: 30px 15px #8e1a19, 45px 15px #ac0500, 75px 15px #f73f0c, 90px 15px
      #fa5f27, 15px 30px #740100, 30px 30px #8e0500, 45px 30px #8e1918, 60px
      30px #ca1300, 75px 30px #f34f2b, 90px 30px #df351f, 105px 30px #f77c2a, 15px
      45px #4b0000, 30px 45px #690100, 45px 45px #8e0f0b, 60px 45px #bf1000, 75px
      45px #f84010, 90px 45px #f04222, 105px 45px #fa5724, 15px 60px #451312, 30px
      60px #5a0100, 45px 60px #840e0c, 60px 60px #a51d1a, 75px 60px #ed2805, 90px
      60px #d9321e, 105px 60px #f44622, 30px 75px #3b0000, 45px 75px #5d1a1b, 60px
      75px #8e1a19, 75px 75px #a80700, 90px 75px #b90a00, 45px 90px #3d0000, 60px
      90px #551415, 75px 90px #670100, 60px 105px #340000;
  animation: pulse 1.2s steps(1) infinite;
}
2
3
4
5
6
7
8
9
10
11
12
13
14
15
16
17
18
# 掩人耳目式海浪动效
<div class="wave"></div>
.wave {
  position: relative;
  width: 150px;
  height: 150px;
  background-color: #5291e0;
  overflow: hidden;

  // 两个不规则圆形(相对盒子进行定位,距离底部距离则为波浪高度)
  &::before,
  &::after {
    content: "";
    position: absolute;
    left: 50%;
    bottom: 15%;
    width: 500%;
    height: 500%;
    border-radius: 45%;
    background-color: #fff;
    transform: translateX(-50%); // 居中
    animation: rotate 15s linear infinite;
  }

  @keyframes rotate {
  from {
    transform: translateX(-50%) rotateZ(0deg);
  }

  to {
    transform: translateX(-50%) rotateZ(360deg);
  }
2
3
4
5
6
7
8
9
10
11
12
13
14
15
16
17
18
19
20
21
22
23
24
25
26
27
28
29
30
# 深藏在 CSS 里的诗情画意
# 你的手指在哪里
<style>
  body {
    padding: 2em;
    text-align: center;
  }
  .block {
    position: relative;
    display: inline-block;
    overflow: hidden;
    width: 10em;
    height: 10em;
    vertical-align: middle;
    -webkit-transform: translateZ(0);
  }
  .block_hoverer {
    position: absolute;
    z-index: 1;
    width: 100%;
    height: 100%;
    opacity: 0;
    transition: all 0.3s ease;
  }

  .block_hoverer:nth-child(1) {
    background: red;
    top: -90%;
  }

  .block_hoverer:nth-child(2) {
    background: lime;
    top: 90%;
  }

  .block_hoverer:nth-child(3) {
    background: orange;
    left: -90%;
  }

  .block_hoverer:nth-child(4) {
    background: blue;
    left: 90%;
  }
  .block_hoverer:hover {
    opacity: 1;
    top: 0;
    left: 0;
  }

  .block_content {
    position: absolute;
    top: 0;
    left: 0;
    width: 100%;
    height: 100%;
    text-align: center;
    line-height: 10em;
    background: #333;
    color: #fff;
  }
</style>
<p class="text">从不同方向使鼠标指针移过下面的内容</p>
<p>↓</p>
<span>→ </span>
<div class="block">
  <div class="block_hoverer">1</div>
  <div class="block_hoverer">2</div>
  <div class="block_hoverer">3</div>
  <div class="block_hoverer">4</div>
  <div class="block_content">
    Hover me!
  </div>
</div>
<span> ←</span>
<p>↑</p>
2
3
4
5
6
7
8
9
10
11
12
13
14
15
16
17
18
19
20
21
22
23
24
25
26
27
28
29
30
31
32
33
34
35
36
37
38
39
40
41
42
43
44
45
46
47
48
49
50
51
52
53
54
55
56
57
58
59
60
61
62
63
64
65
66
67
68
69
70
71
72
73
74
# 摘下星星送给你
<style>
  html,
  body,
  div {
    margin: 0;
    padding: 0;
  }
  html,
  body {
    width: 100%;
    height: 100%;
  }
  .container1,
  .container2 {
    font-size: 60px;
    display: flex;
    flex-direction: row-reverse;
    justify-content: center;
  }
  .container1 input {
    opacity: 0;
    position: absolute;
  }
  .container1 label {
    color: #aaa;
    text-decoration: none;
    -webkit-transition: color 0.4s;
    -moz-transition: color 0.4s;
    -o-transition: color 0.4s;
    transition: color 0.4s;
  }
  .container1 label:hover ~ label,
  .container1 input:focus ~ label,
  .container1 label:hover {
    color: #cc163a;
    cursor: pointer;
  }

  .container2 label {
    cursor: pointer;
    font-size: 60px;
  }
  .container2 input {
    opacity: 0;
    position: absolute;
  }
  .container2 label:hover ~ label,
  .container2 label:hover,
  .container2 input:focus ~ label,
  .container2 input:checked ~ label {
    color: #cc163a;
  }
</style>
<section class="container1">
  <input name="star1" id="s1" type="radio" /><label for="s1">☆</label>
  <input name="star1" id="s2" type="radio" /><label for="s2">☆</label>
  <input name="star1" id="s3" type="radio" /><label for="s3">☆</label>
  <input name="star1" id="s4" type="radio" /><label for="s4">☆</label>
  <input name="star1" id="s5" type="radio" /><label for="s5">☆</label>
</section>
<section class="container2">
  <input type="radio" name="star2" id="s6" />
  <label for="s6">☆</label>
  <input type="radio" name="star2" id="s7" />
  <label for="s7">☆</label>
  <input type="radio" name="star2" id="s8" />
  <label for="s8">☆</label>
  <input type="radio" name="star2" id="s9" />
  <label for="s9">☆</label>
  <input type="radio" name="star2" id="s10" />
  <label for="s10">☆</label>
</section>
2
3
4
5
6
7
8
9
10
11
12
13
14
15
16
17
18
19
20
21
22
23
24
25
26
27
28
29
30
31
32
33
34
35
36
37
38
39
40
41
42
43
44
45
46
47
48
49
50
51
52
53
54
55
56
57
58
59
60
61
62
63
64
65
66
67
68
69
70
71
72
# 滴水穿石
<style>
  .water-damage {
    position: absolute;
    top: 50%;
    left: 50%;
    transform: translate(-50%, -50%);
    width: 200px;
    height: 200px;
    perspective: 600px;
    transform-style: preserve-3d;
  }
  .water-drop {
    position: absolute;
    top: 50%;
    left: 50%;
    transform: translate(-50%, -50%);
    z-index: 10;
    width: 0;
    height: 0;
    border: 10px solid #30dff3;
    border-radius: 1000px;
    margin-top: -10px;
    margin-left: -10px;
    opacity: 0;
    transform-style: preserve-3d;
    transform-origin: 50% 50%;
    transform: translate(0, -100px) scale(1, 1);
    animation: water-drop 3000ms cubic-bezier(0.56, 0.18, 0.92, 0.69) infinite;
  }
  .water-drop::after {
    content: "";
    width: 0;
    height: 0;
    border-style: solid;
    border-width: 0 7.5px 13px 7.5px;
    border-color: transparent transparent #30dff3 transparent;
    position: absolute;
    left: 50%;
    top: -20px;
    transform: translate(-50%, 0);
  }
  @keyframes water-drop {
    0% {
      opacity: 0;
      z-index: 10;
      transform: translate(0, -100px) scale(1, 1);
    }
    50% {
      opacity: 1;
      z-index: 10;
      transform: translate(0, 0) scale(0.8, 1.2);
    }
    51% {
      opacity: 1;
      z-index: 10;
      margin-top: -10px;
      margin-left: -10px;
      border-width: 10px;
      transform: rotateX(70deg);
      animation-timing-function: cubic-bezier(0.12, 0.41, 0.63, 0.99);
    }
    100% {
      opacity: 0;
      z-index: 1;
      margin-top: -200px;
      margin-left: -200px;
      border-width: 200px;
      transform: rotateX(70deg);
      animation-timing-function: cubic-bezier(0.12, 0.41, 0.63, 0.99);
    }
  }
</style>
<div class="water-damage">
  <div class="water-drop"></div>
</div>
2
3
4
5
6
7
8
9
10
11
12
13
14
15
16
17
18
19
20
21
22
23
24
25
26
27
28
29
30
31
32
33
34
35
36
37
38
39
40
41
42
43
44
45
46
47
48
49
50
51
52
53
54
55
56
57
58
59
60
61
62
63
64
65
66
67
68
69
70
71
72
73
74
75