# 滚动与大数据组件
# ListView
滚动组件,常用组件之一,用于展示大量数据的列表
数据较少时,可以直接使用如下方式:
ListView(
  children: <Widget>[
    _ListItem(title: '1',),
    _ListItem(title: '2',),
    _ListItem(title: '3',),
    _ListItem(title: '4',),
    _ListItem(title: '5',),
    _ListItem(title: '6',),
  ],
)
1
2
3
4
5
6
7
8
9
10
2
3
4
5
6
7
8
9
10
_ListItem 定义如下:
class _ListItem extends StatelessWidget {
final String title;
const _ListItem({Key key, this.title}) : super(key: key);
Widget build(BuildContext context) {
return Card(
child: Container(
height: 45,
alignment: Alignment.center,
child: Text('$title'),
),
);
}
}
1
2
3
4
5
6
7
8
9
10
11
12
13
14
15
16
2
3
4
5
6
7
8
9
10
11
12
13
14
15
16
这种方式一次加载所有的组件,没有“懒加载”,因此当有大量数据时,使用动态创建列表的方式:
ListView.builder(
  itemBuilder: (BuildContext context, int index) {
    return _ListItem(
      title: '$index',
    );
  },
  itemExtent: 50,
)
1
2
3
4
5
6
7
8
2
3
4
5
6
7
8
- itemExtent 表示每一个 Item 的高度。
- itemCount 表示个数。
在每一项中间增加分割线可以使用如下方式:
ListView.separated(
  itemBuilder: (BuildContext context, int index) {
    return Container(
      height: 45,
      alignment: Alignment.center,
      child: Text('$index'),
    );
  },
  separatorBuilder: (BuildContext context, int index){
    return Divider();
  },
  itemCount: 30,

)
1
2
3
4
5
6
7
8
9
10
11
12
13
14
2
3
4
5
6
7
8
9
10
11
12
13
14
- scrollDirection 表示滚动方向,默认是垂直方向,可以设置为水平方向。
- reverse 表示是否反转滚动方向,比如当前滚动方向是垂直方向,reverse : true,滚动方向为从上倒下,reverse:false,滚动方向为从下倒上。
- ScrollController 是 ListView 组件的控制器,通过 ScrollController 可以获取当前滚动的位置,也可以滚动到指定的位置
class _ListViewDemoState extends State<ListViewDemo> {
ScrollController _controller;
void initState() {
_controller = ScrollController()
..addListener(() {
print('${_controller.position}');
});
super.initState();
}
Widget build(BuildContext context) {
return ListView.builder(
controller: _controller,
reverse: false,
itemBuilder: (BuildContext context, int index) {
return _ListItem(
title: '$index',
);
},
itemCount: 30,
itemExtent: 50,
);
}
}
1
2
3
4
5
6
7
8
9
10
11
12
13
14
15
16
17
18
19
20
21
22
23
24
25
26
27
2
3
4
5
6
7
8
9
10
11
12
13
14
15
16
17
18
19
20
21
22
23
24
25
26
27
滚动到指定位置
Widget build(BuildContext context) {
return Column(
children: <Widget>[
Container(
child: RaisedButton(
child: Text('滚动到指定位置'),
onPressed: () {
_controller.animateTo(200,
duration: Duration(milliseconds: 300), curve: Curves.linear);
},
),
),
Expanded(
child: ListView.builder(
controller: _controller,
reverse: false,
itemBuilder: (BuildContext context, int index) {
return _ListItem(
title: '$index',
);
},
itemCount: 30,
itemExtent: 50,
),
)
],
);
}
1
2
3
4
5
6
7
8
9
10
11
12
13
14
15
16
17
18
19
20
21
22
23
24
25
26
27
28
29
2
3
4
5
6
7
8
9
10
11
12
13
14
15
16
17
18
19
20
21
22
23
24
25
26
27
28
29
- physics 参数表示当滚动到顶部或者底部时滚动的物理特性,比如设置为不可滚动:
GridView(
    physics: NeverScrollableScrollPhysics(),
  ···
)
1
2
3
4
2
3
4
系统提供的 ScrollPhysics 有:
- AlwaysScrollableScrollPhysics:总是可以滑动
- NeverScrollableScrollPhysics:禁止滚动
- BouncingScrollPhysics :内容超过一屏 上拉有回弹效果
- ClampingScrollPhysics :包裹内容 不会有回弹
# GridView
GridView(
  gridDelegate: SliverGridDelegateWithFixedCrossAxisCount(
    crossAxisCount: 3,
  ),
  children: [
    _createGridViewItem(Colors.primaries[0]),
    _createGridViewItem(Colors.primaries[1]),
    _createGridViewItem(Colors.primaries[2]),
    _createGridViewItem(Colors.primaries[3]),
    _createGridViewItem(Colors.primaries[4]),
    _createGridViewItem(Colors.primaries[5]),
    _createGridViewItem(Colors.primaries[6]),
    _createGridViewItem(Colors.primaries[7]),

  ],
)
_createGridViewItem(Color color){
    return Container(
      height: 80,
      color: color,
    );
  }
1
2
3
4
5
6
7
8
9
10
11
12
13
14
15
16
17
18
19
20
21
22
2
3
4
5
6
7
8
9
10
11
12
13
14
15
16
17
18
19
20
21
22
- gridDelegate 参数控制子控件的排列,有 2 个选择:
- SliverGridDelegateWithFixedCrossAxisCount:交叉轴方向上固定数量,对于垂直方向的 GridView 来说交叉轴方向指的是水平方向。
- crossAxisCount:交叉轴方向上个数。
- mainAxisSpacing:主轴方向上 2 行之间的间隔。
- crossAxisSpacing:交叉轴方向上之间的间隔。
- childAspectRatio:子控件宽高比。
- SliverGridDelegateWithMaxCrossAxisExtent:交叉轴方向上尽量大,比如水平方上有 500 空间,指定此值为 150,那么可以放 3 个,剩余一些空间,此时 GridView 将会缩小每一个 Item,放置 4 个。
- SliverGridDelegateWithFixedCrossAxisCount:交叉轴方向上固定数量,对于垂直方向的 GridView 来说交叉轴方向指的是水平方向。
- scrollDirection 表示滚动方向,默认是垂直方向,可以设置为水平方向。
- reverse 表示是否反转滚动方向,比如当前滚动方向是垂直方向,reverse 设置为 true,滚动方向为从上倒下,设置为 false,滚动方向为从下倒上。
GridView 提供了一些快速构建的方法,比如 builder,用法如下:
GridView.builder(
  gridDelegate: SliverGridDelegateWithFixedCrossAxisCount(
    crossAxisCount: 3,
  ),
  itemBuilder: (context, index) {
    return Container(
      height: 80,
      color: Colors.primaries[index % Colors.primaries.length],
    );
  },
  itemCount: 50,
)
1
2
3
4
5
6
7
8
9
10
11
12
2
3
4
5
6
7
8
9
10
11
12
itemBuilder 是构建子控件,itemCount 指定数据个数。
# 使用 GridView.custom 构建
GridView.custom(
  gridDelegate: SliverGridDelegateWithFixedCrossAxisCount(
    crossAxisCount: 3,
  ),
  childrenDelegate: SliverChildBuilderDelegate((context, index) {
    return Container(
        height: 80,
        color: Colors.primaries[index % Colors.primaries.length]);
  }, childCount: 50),
)
1
2
3
4
5
6
7
8
9
10
2
3
4
5
6
7
8
9
10
# 使用 GridView.count 构建
GridView.count(
  crossAxisCount: 3,
  children: List.generate(50, (i) {
    return Container(
      height: 80,
      color: Colors.primaries[i % Colors.primaries.length],
    );
  }),
)
1
2
3
4
5
6
7
8
9
2
3
4
5
6
7
8
9
# 使用 GridView.extent 构建
GridView.extent(
  maxCrossAxisExtent: 100,
  children: List.generate(50, (i) {
    return Container(
      height: 80,
      color: Colors.primaries[i % Colors.primaries.length],
    );
  }),
)
1
2
3
4
5
6
7
8
9
2
3
4
5
6
7
8
9
# PageView
可以实现一个“图片轮播”的效果,PageView 不仅可以水平滑动也可以垂直滑动
PageView(
    children: <Widget>[
        MyPage1(),
        MyPage2(),
        MyPage3(),
    ],
)
1
2
3
4
5
6
7
2
3
4
5
6
7
- PageView 滚动方向默认是水平,可以设置其为垂直方向
- PageView 配合 PageController 可以实现非常酷炫的效果,控制每一个 Page 不占满,
- initialPage 表示当前加载第几页,默认第一页
- onPageChanged 属性是页面发生变化时的回调
PageView(
    controller: PageController(
        viewportFraction: 0.9,
        ),
    ...
)
1
2
3
4
5
6
2
3
4
5
6
# 无限滚动
- PageView 滚动到最后时希望滚动到第一个页面,这样看起来 PageView 是无限滚动的
List<Widget> pageList = [PageView1(), PageView2(), PageView3()];

PageView.builder(
    itemCount: 10000,
    itemBuilder: (context, index) {
        // 巧妙的利用取余重复构建页面实现PageView无限滚动的效果
        return pageList[index % (pageList.length)];
    },
)
1
2
3
4
5
6
7
8
9
2
3
4
5
6
7
8
9
# DataTable
DataTable(
  columns: [
    DataColumn(label: Text('姓名')),
    DataColumn(label: Text('年龄')),
  ],
  rows: [
    DataRow(cells: [
      DataCell(Text('老孟')),
      DataCell(Text('18')),
    ]),

  ],
)
1
2
3
4
5
6
7
8
9
10
11
12
13
2
3
4
5
6
7
8
9
10
11
12
13
columns参数是 DataTable 的列,rows参数是 DataTable 的每一行数据- sortColumnIndex 参数表示表格显示排序图标的索引,sortAscending 参数表示升序或者降序
# DataColumn
- 默认情况下数据是左对齐的,让某一列右对齐只需设置 DataColumn 中
numeric参数 true - tooltip 参数表示当长安此表头时显示提示
- onSort 回调是用户点击表头(DataColumn)时的回调,onSort 中第一个参数 columnIndex 表示索引,ascending 参数表示升序或者降序
DataColumn(label: Text('年龄'), onSort: (int columnIndex, bool ascending){
//排序算法
}),
1
2
3
2
3
# DataRow
- 可以显示其中一行被选中,设置 DataRow 中 selected 参数为 true
- onSelectChanged 参数是点击每一行数据时的回调
# DataCell
- DataCell 是 DataRow 中每一个子控件,DataCell 子控件不一定是文本,也可以是图标等任意组件,我们可以给 DataCell 设置编辑图标
- placeholder 参数也是一样的,设置为 true,仅仅是文字的样式变化了,
- onTap 为点击回调
# 排序
DataTable(
    sortColumnIndex: 1,
    sortAscending: _sortAscending,
    columns: [
      DataColumn(label: Text('姓名')),
      DataColumn(label: Text('年龄'), onSort: (int columnIndex, bool ascending){
        setState(() {
          _sortAscending = ascending;
          if(ascending){
            data.sort((a, b) => a.age.compareTo(b.age));
          }else {
            data.sort((a, b) => b.age.compareTo(a.age));
          }
        });
      }),
    ],
    rows: data.map((user) {
      return DataRow(cells: [
        DataCell(Text('${user.name}')),
        DataCell(Text('${user.age}')),
      ]);
    }).toList())
1
2
3
4
5
6
7
8
9
10
11
12
13
14
15
16
17
18
19
20
21
22
2
3
4
5
6
7
8
9
10
11
12
13
14
15
16
17
18
19
20
21
22
# 处理数据显示不全问题
当表格列比较多的时候,可以使用 SingleChildScrollView 包裹 DataTable,显示不全时滚动显示
List<DataRow> dateRows = [];
for (int i = 0; i < data.length; i++) {
  dateRows.add(DataRow(
    cells: [
      DataCell(Text('${data[i].name}')),
      DataCell(Text('${data[i].age}')),
      DataCell(Text('男')),
      DataCell(Text('2020')),
      DataCell(Text('10')),
    ],
  ));
}
return SingleChildScrollView(
  scrollDirection: Axis.horizontal,
  child: DataTable(columns: [
    DataColumn(label: Text('姓名')),
    DataColumn(
      label: Text('年龄'),
    ),
    DataColumn(
      label: Text('性别'),
    ),
    DataColumn(
      label: Text('出生年份'),
    ),
    DataColumn(
      label: Text('出生月份'),
    ),
  ], rows: dateRows),
);
1
2
3
4
5
6
7
8
9
10
11
12
13
14
15
16
17
18
19
20
21
22
23
24
25
26
27
28
29
30
2
3
4
5
6
7
8
9
10
11
12
13
14
15
16
17
18
19
20
21
22
23
24
25
26
27
28
29
30
# 案例-自定义 PageView 滚动动画
class ViewPage extends StatefulWidget {
State<StatefulWidget> createState() => _ViewPageState();
}
class _ViewPageState extends State<ViewPage> {
var imgList = [
'https://ss1.bdstatic.com/70cFvXSh_Q1YnxGkpoWK1HF6hhy/it/u=2877516247,37083492&fm=26&gp=0.jpg',
'https://timgsa.baidu.com/timg?image&quality=80&size=b9999_10000&sec=1582796218195&di=04ce93c4ac826e19067e71f916cec5d8&imgtype=0&src=http%3A%2F%2Fhbimg.b0.upaiyun.com%2F344fda8b47808261c946c81645bff489c008326f15140-koiNr3_fw658'
];
PageController _pageController;
var _currPageValue = 0.0;
//缩放系数
double _scaleFactor = .8;
//view page height
double _height = 230.0;
void initState() {
super.initState();
_pageController = PageController(viewportFraction: 0.9);
_pageController.addListener(() {
setState(() {
_currPageValue = _pageController.page;
});
});
}
void dispose() {
super.dispose();
_pageController.dispose();
}
Widget build(BuildContext context) {
return Container(
height: _height,
child: PageView.builder(
itemBuilder: (context, index) => _buildPageItem(index),
itemCount: 10,
controller: _pageController,
));
}
_buildPageItem(int index) {
Matrix4 matrix4 = Matrix4.identity();
if (index == _currPageValue.floor()) {
//当前的item
var currScale = 1 - (_currPageValue - index) * (1 - _scaleFactor);
var currTrans = _height * (1 - currScale) / 2;
matrix4 = Matrix4.diagonal3Values(1.0, currScale, 1.0)
..setTranslationRaw(0.0, currTrans, 0.0);
} else if (index == _currPageValue.floor() + 1) {
//右边的item
var currScale =
_scaleFactor + (_currPageValue - index + 1) * (1 - _scaleFactor);
var currTrans = _height * (1 - currScale) / 2;
matrix4 = Matrix4.diagonal3Values(1.0, currScale, 1.0)
..setTranslationRaw(0.0, currTrans, 0.0);
} else if (index == _currPageValue.floor() - 1) {
//左边
var currScale = 1 - (_currPageValue - index) * (1 - _scaleFactor);
var currTrans = _height * (1 - currScale) / 2;
matrix4 = Matrix4.diagonal3Values(1.0, currScale, 1.0)
..setTranslationRaw(0.0, currTrans, 0.0);
} else {
//其他,不在屏幕显示的item
matrix4 = Matrix4.diagonal3Values(1.0, _scaleFactor, 1.0)
..setTranslationRaw(0.0, _height * (1 - _scaleFactor) / 2, 0.0);
}
return Transform(
transform: matrix4,
child: Padding(
padding: EdgeInsets.symmetric(horizontal: 10),
child: Container(
decoration: BoxDecoration(
borderRadius: BorderRadius.circular(12),
image: DecorationImage(
image: NetworkImage(imgList[index % 2]), fit: BoxFit.fill),
),
),
),
);
}
}
1
2
3
4
5
6
7
8
9
10
11
12
13
14
15
16
17
18
19
20
21
22
23
24
25
26
27
28
29
30
31
32
33
34
35
36
37
38
39
40
41
42
43
44
45
46
47
48
49
50
51
52
53
54
55
56
57
58
59
60
61
62
63
64
65
66
67
68
69
70
71
72
73
74
75
76
77
78
79
80
81
82
83
84
85
86
87
88
89
90
91
92
2
3
4
5
6
7
8
9
10
11
12
13
14
15
16
17
18
19
20
21
22
23
24
25
26
27
28
29
30
31
32
33
34
35
36
37
38
39
40
41
42
43
44
45
46
47
48
49
50
51
52
53
54
55
56
57
58
59
60
61
62
63
64
65
66
67
68
69
70
71
72
73
74
75
76
77
78
79
80
81
82
83
84
85
86
87
88
89
90
91
92
# 案例-滚动条
默认情况下,Flutter 的滚动组件(比如 ListView)没有显示滚动条,使用 Scrollbar 显示滚动条
Scrollbar(
  child: ListView.builder(
    reverse: false,
    itemBuilder: (BuildContext context, int index) {
      return Card(
        child: Container(
          height: 45,
          alignment: Alignment.center,
          child: Text('$index'),
        ),
      );
    },
    itemCount: 30,
    itemExtent: 50,
  ),
)
1
2
3
4
5
6
7
8
9
10
11
12
13
14
15
16
2
3
4
5
6
7
8
9
10
11
12
13
14
15
16
bool _handleScrollNotification(ScrollNotification notification) {
final ScrollMetrics metrics = notification.metrics;
print('滚动组件最大滚动距离:${metrics.maxScrollExtent}');
print('当前滚动位置:${metrics.pixels}');
return true;
}
Widget build(BuildContext context) {
return NotificationListener<ScrollNotification>(
onNotification: _handleScrollNotification,
child: ListView.builder(
reverse: false,
itemBuilder: (BuildContext context, int index) {
return Card(
child: Container(
height: 45,
alignment: Alignment.center,
child: Text('$index'),
),
);
},
itemCount: 30,
itemExtent: 50,
),
);
}
1
2
3
4
5
6
7
8
9
10
11
12
13
14
15
16
17
18
19
20
21
22
23
24
25
26
27
2
3
4
5
6
7
8
9
10
11
12
13
14
15
16
17
18
19
20
21
22
23
24
25
26
27
通过 ScrollNotification 获取当前滚动组件最大滚动距离和当前滚动位置,其中 metrics.maxScrollExtent 表示当前滚动组件最大滚动距离,metrics.pixels 表示当前滚动位置。
通过这两个值计算滚动条在当前屏幕的位置,通过 Stack 组件 将 ListView 和 自定义的滚动条进行叠加显示
NotificationListener<ScrollNotification>(
  onNotification: _handleScrollNotification,
  child: Stack(
    alignment: Alignment.topRight,
    children: <Widget>[
      ListView.builder(
        reverse: false,
        itemBuilder: (BuildContext context, int index) {
          return Card(
            child: Container(
              height: 45,
              alignment: Alignment.center,
              child: Text('$index'),
            ),
          );
        },
        itemCount: 30,
        itemExtent: 50,
      ),
      //滚动条
      Container(
        height: 100,
        width: 20,
        color: Colors.red,
      )
    ],
  ),
)
1
2
3
4
5
6
7
8
9
10
11
12
13
14
15
16
17
18
19
20
21
22
23
24
25
26
27
28
2
3
4
5
6
7
8
9
10
11
12
13
14
15
16
17
18
19
20
21
22
23
24
25
26
27
28
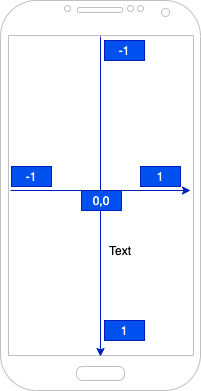
将此滚动条和 NotificationListener 监听到的滚动事件联动,通过 Container 的 alignment 属性控制滚动条的位置:
Container(
  alignment: Alignment(1, _alignmentY),
  padding: EdgeInsets.only(right: 5),
  child: Container(
    height: 100,
    width: 20,
    color: Colors.red,
  ),
)
1
2
3
4
5
6
7
8
9
2
3
4
5
6
7
8
9
_alignmentY 就是计算出的偏移位置,计算方法如下:
_alignmentY = -1 + (metrics.pixels / metrics.maxScrollExtent) * 2;
1
class _ScrollBar extends StatelessWidget {
Widget build(BuildContext context) {
return Container(
width: 18,
height: 60,
decoration: BoxDecoration(
shape: BoxShape.rectangle,
borderRadius: BorderRadius.all(Radius.circular(20)),
color: Colors.blue),
child: Column(
mainAxisAlignment: MainAxisAlignment.center,
children: <Widget>[
Icon(
Icons.arrow_drop_up,
size: 18,
),
Icon(
Icons.arrow_drop_down,
size: 18,
),
],
),
);
}
}
1
2
3
4
5
6
7
8
9
10
11
12
13
14
15
16
17
18
19
20
21
22
23
24
25
26
2
3
4
5
6
7
8
9
10
11
12
13
14
15
16
17
18
19
20
21
22
23
24
25
26